Coexist Cardboard Furniture Challenge, Pt 2
- Ahmad Ahseek

- Jan 20, 2022
- 2 min read

After obtaining our art direction and concept we started applying it to our designs and started modelling it for testing.


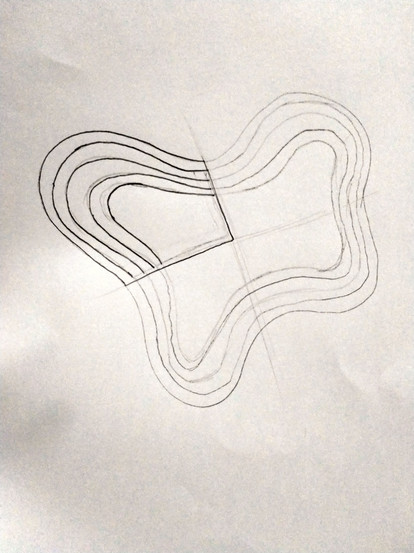
I then sketched out my idea but this time including the art direction we came up with. I did more sketches, you may not understand what I did, there's no like technical knowledge behind these, but doodling like that help me to visualize it and come up with the joining methods and so on.


I tried to make a scaled portion of the coffee table, however, it went all wrong as you can see. This model was on the other hand, not to scale and way too small.


Despite my failure with this first model, I stacked it up to display the aesthetic I was going for. The second one with 2 large pieces at both ends is more accurate.


My groupmates also did some tryouts which were more successful than mine.


So I made it up to scale and I used this shape as a template to cut it on cardboard, for the new model.

I used the template and cut them in cardboard, they look amazing at this point.

But I had to cut it in even shorter pieces.


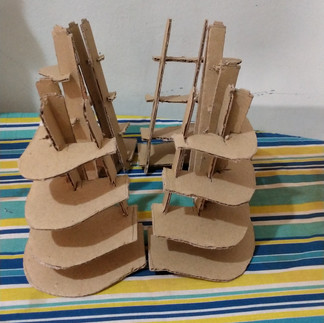


However, during assembly, this is what happened. It was very fragile and definitely not stable.

My classmate work wasn't that good either tho. In the images, it seem stable but it was far from that.

My next direction was quite stupid tho. I assumed that having it this way will help in the stability, which it did, but since the joining method is not strong enough any weight added on it, the whole thing would collapse.

For the next round, I was planning on simplifying the design a lot and trying something as I sketched. However, I wanted to get the idea verified and do something that will work for sure this time.


By that time, the others design were actually in the model phase, which took a while compared to mine. The had a few issues too most notably the last guy's work which he used tape to seal the design which wasn't supposed to be used at all.


At this point we consulted an ID lecturer who taught us quite a bit about the effect of gravity over cardboard and paper and how to strengthen a design made out of cardboard or paper.
For my design I had to simply change the joining method from the side to the top.


So I planned to have the joining method from the top and having another piece locking on the top to provide with the flat surface.


Comments