Well, I just simply continued what I was already doing.
This is the base for the 3rd vase. I did a squared base this time just to change a bit.
I did 4 rectangles which I gave them a trapezium-ish shape afterward..again to make things more interesting. Of course I glued them all together same technique as the previous ones.
I started the final piece with a semi sphere. I already pluck the hole and then I shaped the corners so that it goes with the rest.
Of course I glued everything together, but as you can see I had that same issue of it squashing on itself. I think this one had more weight and also too much connections, so it was more fragile than the previous ones I did.
Luckily, I was able to re-moisturise the clay and make it fully moldable again. I firstly tried to shape a piece of aluminium foil into the shape I was looking for which fails as well. Therefore I took some SERIOUS measures, creating a template out of cardboard. I just assured that the orifice was larger as compared to the other models so that I can remove the template later on. I just let is sit like this for 2 days.
After that it was fully dry and I could use my hands themselves to remove it. I didn't need the aid of the cutter even though I had it there just in case.
And these are the 2 last models I did fully smoothen.
This is the final Vase I had to to. I was thinking of a very simple shape but I ended up making it more interesting while using this cup I had. Actually, the corners I had to do it manually, it was not taking the shape of the cup even tho I used it as a template. Similarly I kept in for 2 days to assure that it won't fall on itself as always.
Well..............I had issues with my numbers 😅 😂 🤣 🤣
So I use the aid of Microsoft office to get my data in the form of percentage to plot it on the circumference of the vases later.
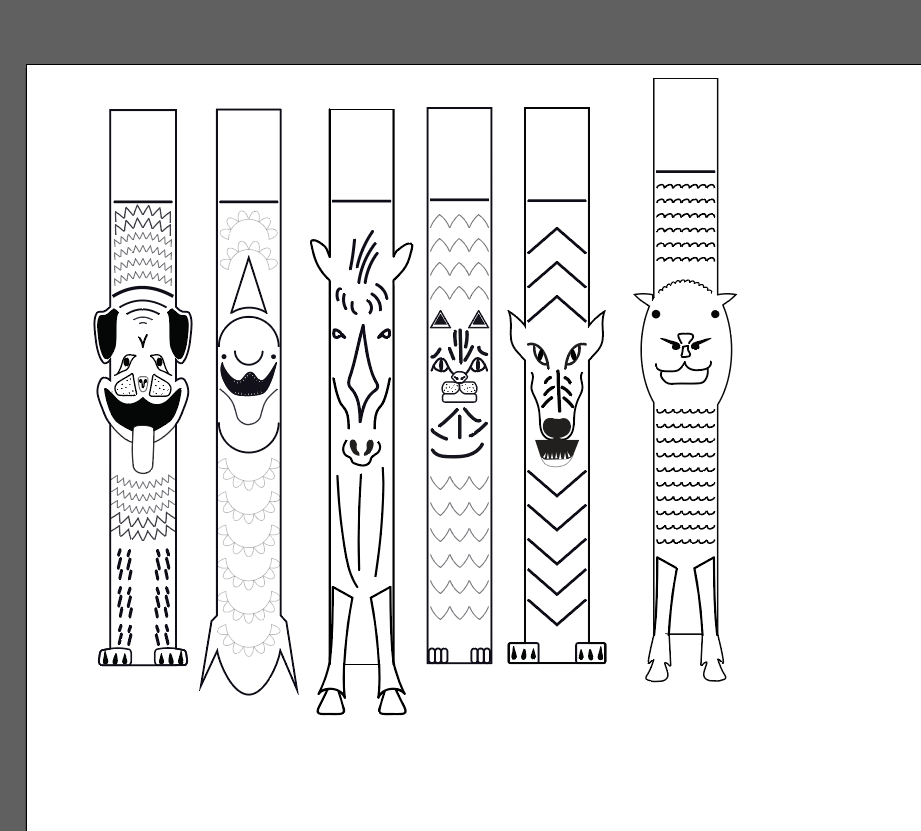
Here's a bit of the changes I did to the wolf and a sheep I designed. I was quite satisfied with it so I didn't change it.
And here's all the design on Illustrator.
I went around to find an appropriate material to cut the design on. I discovered that it was actually hard to find this plywood I used as a scrap material for my tryout for the first dog Totem. The black plywood. Then I found this Hardboard which had this dark tint to it which I was looking for. It was of the appropriate size to cut all the Totems I had on it. However, after talking to the Lab Attendant he told me that the machine at school won't be able to cut through this one.
So I had to use this board I used in the beginning. .....and I encountered yet another issue. It was available only in a max size of A4.
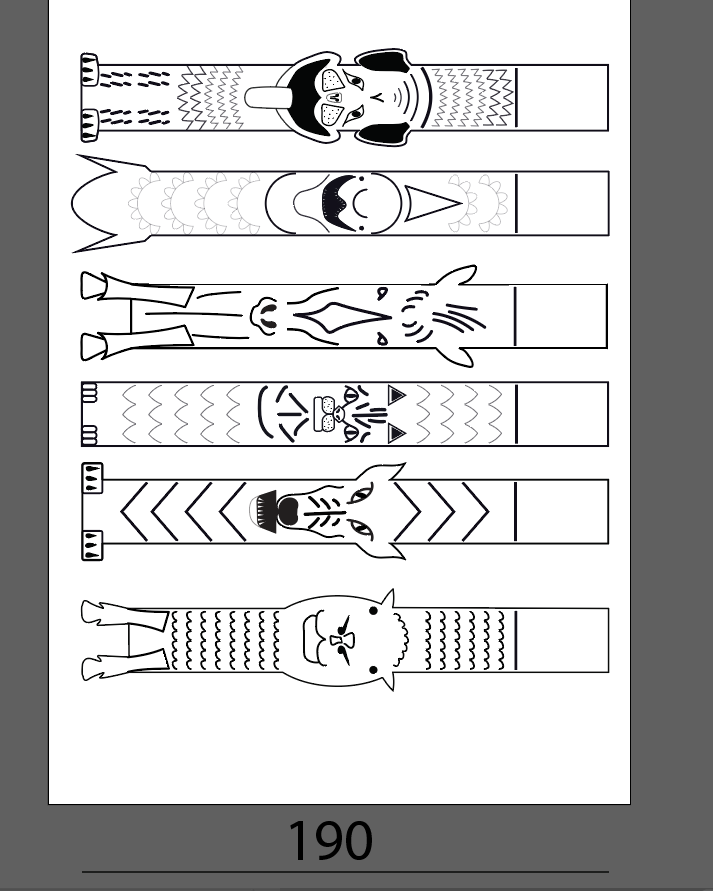
So I just worked on my designs again to get the correct size and now I can actually print them all on 3 different a4 sheets. I'm doing only 3 of each to save money and also to make it look of a quite fair quantity of each on the final photographs.
After 2 days it was finally time to remove the cup from the VERY VERY LAST vase and TADAR.... I broke on me 😭😭😭
I firstly tried to glue it back together with just water, but I lost quite a bit of clay and there were many cracks in the vase. So I used the rest of the clay I had and sealed as many hole and cracks I could and let it rest for 1 night.
The next day it was all sealed up and I was able to polish it without any issue. However it's not as neat as the other designs that I have. but hey... I brought it back from the dead. 👼👼👼👼👼


Comments