Ads progress
- Ahmad Ahseek

- Jul 20, 2020
- 2 min read
There were a few images that were not well placed from the last post, so this is how I dealt with it.


I actually had to use the vector shapes from each banners' on our InDesign file and re-make the layout on the template that I've created.
There was another issue I encounter because we actually lost certain files so this what I did for these banners.


I use that same jpeg that we had of the final banner, and I've... actually masked it out instead of cropping the piece I need, this is just so that I don't do anything destructive and can reveal what other elements I need afterwards in case.
The encircled dog is the layer I've linked it to and as you can see I had to apply a level filter to bring it back to that same tone it had, I've left the other layer with the logo with no filter so that you can see the difference and have an idea on what I did.
And these are actually the corrected works:


I also made a research to know where to place each Banners.

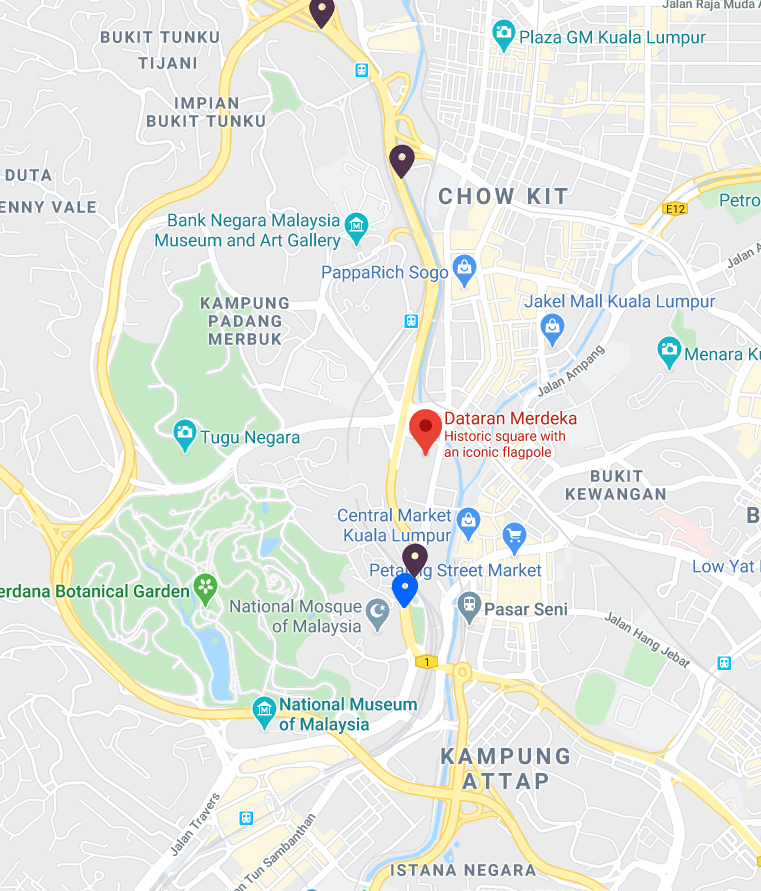
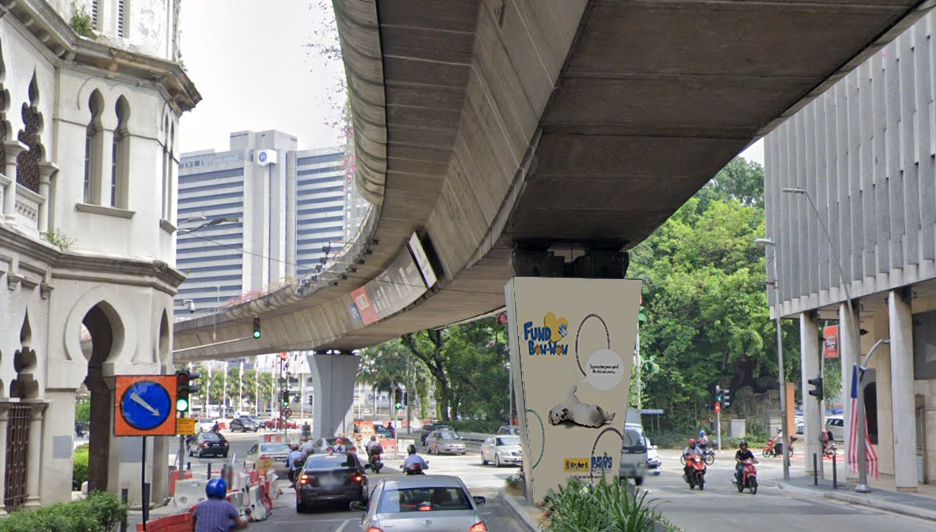
This is the areas for the basic banners we have
This is a populated highway so we had to use it and it's also just n the edge of Dataran Merdeka, so it was essential, the blue pointer indicate a bus stop, there's also a bus trackway on this highway and by this mean we're also aiming the people using the bus.


This is the areas selected for the Banners with the sense of direction.
We had some banners designed specially to point some direction that will lead you in the direction of Dataran Merdeka.


Banners indicating direction.


For the guerillas I've simply added it over the environment and added a shadow with it, by coping the guerilla deforming it, turn it black apply some blending mode and add some more depth with a brush. Of course I had to refer from the image and try and identify the direction of the shadow in the environment.
So the areas we're selecting were in fact important.


Area selected for the guerillas.


Comments